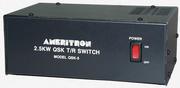
 Ameritron QSK-5
Ameritron QSK-5
![]()
Click Here - More info on Ameritron QSK-5
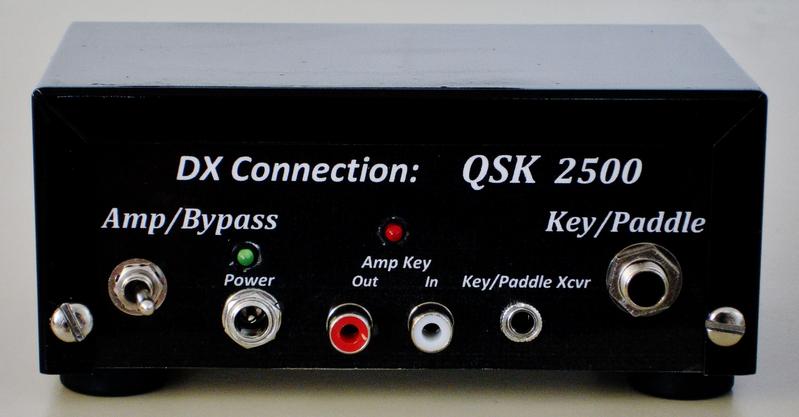
NEW! QSK-2500 QSK switch from DX Connection
Click HERE for more info
 My
current amplifier, Ten Tec Centaur, is a QSK amplifier. In the past I used
the Ameritron QSK-5 with my Ten Tec Omni VI+ and Omni VII along with a Collins
30L-1 amplifier. This switch allowed me to enjoy the awesome Ten Tec QSK
while running the amp. This is an external device (available as an
internal device for some Ameritron amps) that is electronically inserted into
the Omni VII keying loop and provides the proper timing and instant PIN Diode
antenna switching. Hookup to the Omni VII is 'by-the-book' with no
problems or complications. Hookup requires about 4 coax jumpers and 2
phono cables. I do use a
Jackson Harbor Kits Keyall adaptor to keep the higher voltage amp switching out of
the QSK-5 and the Omni VII.
My
current amplifier, Ten Tec Centaur, is a QSK amplifier. In the past I used
the Ameritron QSK-5 with my Ten Tec Omni VI+ and Omni VII along with a Collins
30L-1 amplifier. This switch allowed me to enjoy the awesome Ten Tec QSK
while running the amp. This is an external device (available as an
internal device for some Ameritron amps) that is electronically inserted into
the Omni VII keying loop and provides the proper timing and instant PIN Diode
antenna switching. Hookup to the Omni VII is 'by-the-book' with no
problems or complications. Hookup requires about 4 coax jumpers and 2
phono cables. I do use a
Jackson Harbor Kits Keyall adaptor to keep the higher voltage amp switching out of
the QSK-5 and the Omni VII.
One of the nice features on the Omni VII is that the keying loop can be disabled from the main menu so that the QSK-5 can be bypassed and turned off for barefoot operation of the Omni VII.
I posted a review on eham.net where I was a bit critical of the manual. Click on the link to read my review and the comments of other users.
Before I had the Omni VII I had an Omni VI+. The hookup to the QSK-5 was not as simple so I came up with the following simple mod and procedure to interface to the Omni VI Plus
If you have a Ten Tec Omni VI+ you should try to interface as Ten Tec recommends on their website in there technical support http://kb.tentec.com/index.php?article=38. If that works for you - GREAT! Bring the power up slowly as you test and watch for flashing fuse-lamps on the QSK-5. If they flash - STOP.
It seems I'm not the only one that had timing issues with the Ten Tec approved method. Here's a circuit from PA0RCT solving the timing problem with a couple of isolation diodes and a capacitor - http://home.iae.nl/users/reinc/scrapbk2.htm I don't know how long this link will be good. Let me know if it is no longer active.
If you have trouble making the interface work properly, you may want to make a very tiny mod to the Omni VI+ and hook it up as I have described below.
Ten Tec does its QSK hookups through a keying loop. The keying output from the Omni VI+ normally is jumpered right back into the rig. When hooking up a Ten Tec amp, the keying circuit is un-jumpered and then run INTO the amp. From the amp, the keying circuit returns and goes back into the transceiver. The circuitry in the Ten Tec amps take care of all the delays and timing - ensuring that the transceiver does not transmit till the amp is ready. The point being - you do NOT want to transmit RF out of the Omni and the amplifier until the QSK switching (by relays, vacuum relays, or PIN diodes) is performed and then you do not want to switch back before the RF signal is gone. We are talking milliseconds here.
Go ahead and try the hook-up that Ten Tec shows on their
website. If you get flashing lights - STOP.
Remember this :
Flashing lights are bad! No flashing lights are good!
When I first hooked up the QSK-5 per the info that I found on the Ten Tec website and slowly brought the power up, I noticed that the timing lights were flashing when I unkeyed. According to Ameritron, this indicates that the diodes were being switched back to receive BEFORE the RF was off. This is not good.
So, what signal do we ultimately need to key the QSK-5? How about a signal that comes on BEFORE the keying loop and stays on till AFTER the RF output drops? Well, no sense re-inventing the wheel. Ten Tec has that signal already for us to use. They refer to it as the 'T' voltage. At key down, 'T' goes high (about 12v). then, after a ~10 ms. delay the keying loop is keyed. After the keying loop opens there is another short delay before 'T' goes back to 0 volts.
This 'T' voltage is used throughout the Omni V+ to do many things - but what I noticed in analyzing the circuitry was the fact that one of the function of 'T' is to key a small relay (K1) on the Low Pass Filter Board. This relay closes 10 ms. before RF arrives and persists until after RF is gone. PERFECT! If a relay is good enough for Ten Tec - it will be good enough for me.
I wanted to keep any mods to an easily reversible, minimum. No holes drilled - no circuit mods - easy to do, etc. All I needed was to replicate that relay in the Low Pass Filter Board and use the contacts to key the QSK-5. I had a couple of 12v N.O. reed relays in the junk box. I tested the keying of these relays to make sure that they were fast enough (using my Vibroplex Bug as fast as it could go).
Performing the Installation
The 'T' voltage shows up in many places. The easiest place to find it and tap into it is on the LOW LEVEL DRIVER BOARD. Take the top off the Omni VI+ and it is staring you in the face. On connector 52 it is the blue wire. The only Blue Wire that you can see.
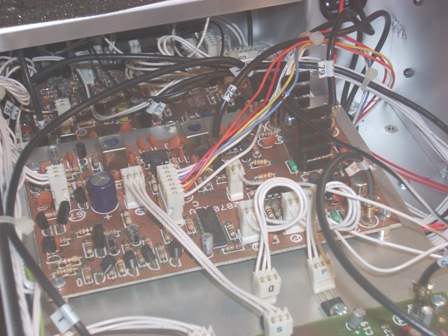
I wanted a very secure connection so I stripped some insulation on the Blue Wire (without cutting the wire). I used about a foot of stranded hook-up wire and soldered it directly to the blue wire. I covered it with a small piece of electrical tape. This could easily be un-done and no one would ever notice.
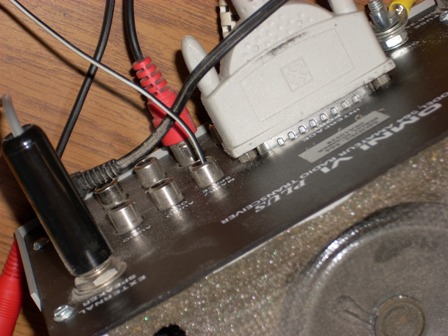
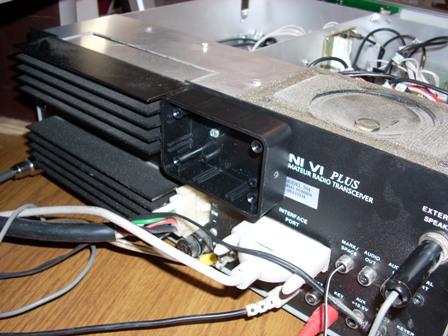
My next goal was to sneak the wire out of the Omni VI+ without drilling any holes, disconnecting any unused phono jacks, etc. I ran the wire thru the unused (and never to be used) MARK/SPACE Phono plug (see below). The wire goes right thru the center hole. Actually, this is easier if you poke the wire thru from the outside first, then make the connection on the Blue Wire.
So, now we have the 'T' voltage out of the Omni VI+. Now we need to just hook up a very small 12v Reed relay coil between this wire and ground. I am sure that Radio Shack 275-233 will work fine. Remember, this relay draws less than 15ma and there will be very little current through this keyed circuit (5v and about 1ma).
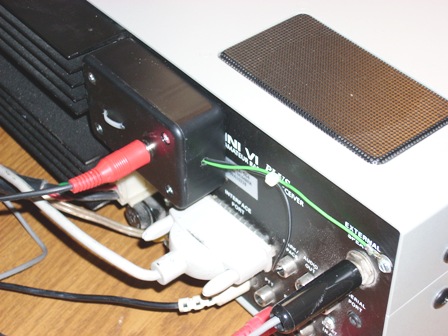
I mounted a small Radio Shack project box on the back of the Omni VI+ using one of the hex-head mounting screws - remember, no holes! (and no double-stick tape or Velcro).
The 'T' voltage lead and a ground wire go through a small hole in the end of the box. I hooked the green ground wire up under the other hex-head mounting screw. This is a very important ground - make sure it is good and solid. I mounted a phono jack on the back of the box and the Reed Relay contacts connect direct to the jack. I secured the Reed Relay to the inside of the box's plastic cover with small nylon ty-wrap. You could also just hot-glue it.
Now, to hook-up to the QSK-5. This 'T' voltage N.O. contact goes directly to KEY2 on the QSK-5. This is a very important connection - if you lose it, you will not be switching the PIN diodes to transmit while the transceiver is transmitting - BAD!! Lights will flash. You might blow the fuse lamps in the QSK-5 but, since the amplifier is NOT keyed, there won't be any damage to the transceiver.
The AUXILLARY jack on the QSK-5 is jumpered to KEY1. The AUXILLARY jack signal is a buffered switch that follows KEY2. I put a short phono cable jumper from AUXILLARY to KEY1. It is the signal from KEY1 that triggers the main amp relay.
I also added a 'Y- connection' on the AMP RELAY keying jack that goes back to the Omni VI+ amp relay contacts so that you can still have normal amp keying if the QSK-5 is OFF for normal SSB operation. Of course, you cannot key the High Voltage relay in the Collins 30L1 (or SB200, etc.) directly with either the Omni VI+ or the QSK-5 - so I use a KeyAll Keying adaptor from Jackson Harbor Kits
Logically, this hook-up provides proper timing for the QSK-5. I have tested it, and it works great. QSK sounds as good with and without the amp. Great QSK at 500w out and no flashing fuse lights!
