 PFR3 Mods
PFR3 Mods
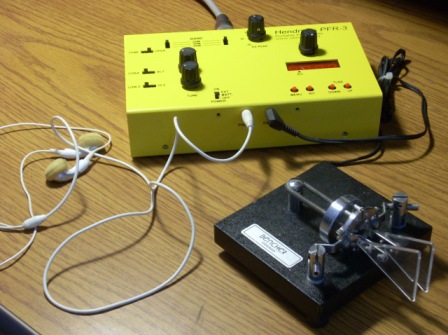
SLUG-A-BUG YELLOW!
The PFR3 is a great rig - just as it comes. But, there are some some mods or customizations that can be made to make it work better for you. Here's one that I made....
PFR3 - Batteries - Charging - Volkswagen solar charger
With my Hendricks PFR3 yellow radio I had to take out the 4 case screws to access the internal battery pack in order to measure, change, or charge the batteries. Replacing the very neat and attractive countersink screws with a thumbscrew makes it a tool-less operation, but opening the case over and over doesn't seem like a great idea. Plus, you then have to either clip-lead to the battery pack or remove the batteries from the pack and remote charge them.
I am using 2600 mah NiMH in my battery pack. These batteries are rated at 1.2v but in actuality they are over 1.2v for most of the duty cycle - so not much loss in output power. (see the voltage/discharge curve in the Battery Status Indicator Kit manual on the Hendricks web site - http://www.qrpkits.com/bsi.html).
%20web.JPG) I
installed the Battery Status Indicator Kit on the front panel to help indicate
the battery charge state with the push of a button. I did not like the idea of
drilling 2 holes in the front panel - but everything worked out fine. Adjusting
the levels was interesting but I think that I got it right - Green when at or
nearly full charge - Red just before the rig starts to misbehave - and
Amber/Orange in between.
I
installed the Battery Status Indicator Kit on the front panel to help indicate
the battery charge state with the push of a button. I did not like the idea of
drilling 2 holes in the front panel - but everything worked out fine. Adjusting
the levels was interesting but I think that I got it right - Green when at or
nearly full charge - Red just before the rig starts to misbehave - and
Amber/Orange in between.
But, even with this kit installed I still needed to access the batteries to charge them. My external 12v power supply (true 12v - not 13.8v) did a pretty good job when clipped onto the battery pack. On low batteries it started with a somewhat large 500ma rate that soon dropped to about 250ma - about 10% of my batteries 2600Mah rating. I thought about just adding a switch that would turn on the charge to the battery pack. I would, of course, forget that the switch was in the 'charge' mode and overcharge the batteries. I also thought about an incandescent bulb in series to limit the current and indicate a rate-of-charge.
%20web.JPG) What
I wanted was electrical access to the battery. So, I added another coaxial
power jack next to the external power jack (yes, drilled another hole in the
case!) I can then plug the external supply into the battery jack and charge the
batteries. I also found that I can turn the rig on in 'BATT.' mode and operate
and charge at the same time. My supply is rated at 3 amps so no problem there.
What
I wanted was electrical access to the battery. So, I added another coaxial
power jack next to the external power jack (yes, drilled another hole in the
case!) I can then plug the external supply into the battery jack and charge the
batteries. I also found that I can turn the rig on in 'BATT.' mode and operate
and charge at the same time. My supply is rated at 3 amps so no problem there.
At this point, with the Battery Status Kit and the separate electrical connection to the battery, there is little need to take the case apart.
%20web.JPG) Next,
I decided to see how well my Volkswagon Solar Panel did charging the internal
batteries. These panels were distributed by Volkswagon with many of their
vehicles with the intent of keeping the car battery up during long periods of
inactivity. They are available on Ebay all of the time.
Next,
I decided to see how well my Volkswagon Solar Panel did charging the internal
batteries. These panels were distributed by Volkswagon with many of their
vehicles with the intent of keeping the car battery up during long periods of
inactivity. They are available on Ebay all of the time.
I did some tests with clip leads and found that the panel would charge the batteries anywhere from about 25ma in the shade to just over 100ma in the sun - depending on the current state of the battery charge.
%20web.JPG) After
cutting off the cigar lighter plug (I put Anderson Power Pole connectors on so
that I could swap connectors in and out) I can now plug the solar panel onto the
internal battery pack while operating. In decent sun under normal operating I
found that the panel actually gains on the batteries. Even in the shade the
25-30 ma charge rate almost keeps up with RX usage.
After
cutting off the cigar lighter plug (I put Anderson Power Pole connectors on so
that I could swap connectors in and out) I can now plug the solar panel onto the
internal battery pack while operating. In decent sun under normal operating I
found that the panel actually gains on the batteries. Even in the shade the
25-30 ma charge rate almost keeps up with RX usage.
I don't know what is easier to carry - a Solar Panel or a spare 5ah gel cell. There is something to be said for both. By the way, the Solar Panel can also keep the gel cells up to charge.
I realize that these are a very simplistic solutions to charging the batteries - no current limiting circuits - no voltage cutoffs - no thermal sensors on the cells with a microprocessor controlling the charge rates and times with pulsed discharge. But maybe that is what you might like about it.